mars 18, 2016
The Experience Editor of Sitecore 8+ includes an invaluable tool – Explore Mode - for any user of Sitecore to see the actual impact of personalization in the Sitecore Experience Platform. Using Explore Mode a user can simulate the experience of a user as they interact with the site and trigger personalization.
In this post we provide a brief introduction to the Explore Mode and provide a checklist to get the most out of this tool. Note: previous versions of Sitecore offer similar capabilities as an add on module.
Starting Explore Mode
To start explore mode, select Explore from the Experience Editor ribbon.

Explore Mode options
When the Explore Mode is active there are two panels that can be opened on the left and right of the window. On the left is Edit panel which lets you dynamically change information about the visitor and visit.

On the left is the View panel which provides a snapshot of the visit and visitor information as defined by the current state of the visit.

Journey and Fixed Mode
When in Explore Mode you can examine how profiles, goals, events, device, location (geo-ip), campaigns and referral information impacts the site experience. The first step is to decide which mode you want to use.
- Fixed Mode. As you navigate through the site all of the values noted above stay the same. The initial values are taken from the Preset (more on presets below). The use of Presets/Fixed Mode is helpful when you need to validate personalization that might need to apply across multiple pages. Example: “for return visitors from China”.
- Journey Mode. As you navigate the site all values accumulate as normal, it allows for the simulation of a real visit. Goals, campaigns, value and profile all build as you navigate the pages.
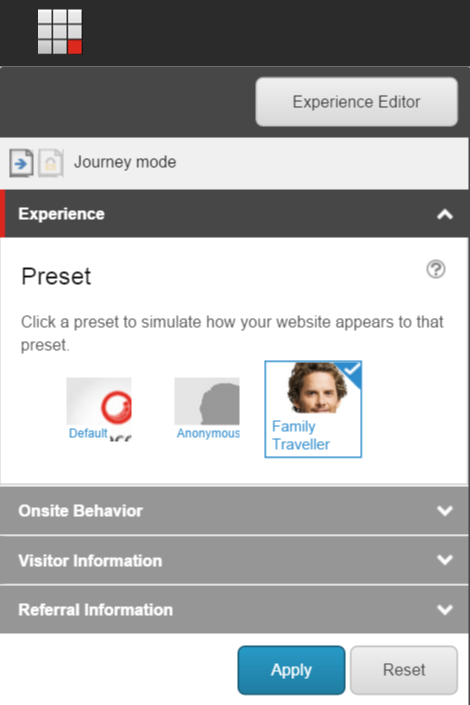
Journey or Fixed Mode can be activated by clicking on the appropriate icon and clicking Apply. In the following screen shot Fixed Mode has been activated.

Presets
As noted earlier Presets define the starting point for an Explore Mode session. To select a preset, simply select it from the list and click Apply.

New presets can be created at /sitecore/system/Marketing Control Panel/Experience Explorer/Presets. This location can be accessed from the Content Editor or the Marketing Control Panel application.
Final tips
As you plan personalization for your Sitecore site, you will want to:
- Define presets for Explore Mode. This allows those implementing the rules and personalization to ensure they have it right. Engage your QA professionals when setting up presets to explore edge cases.
- If Geo-Ip is part of your personalization strategy it can be helpful to have the actual public IP’s of those who might be testing. This might be the public IP of each of your office locations or major customers. This removes any ambiguity about what those team members would see and does double duty to test IP resolution.


